Running ComfyUI in Windows with ROCm on WSL#

If you have an AMD Radeon™ graphics card supported by AMD ROCm™ software, you can unlock the full potential of your Windows PC with ROCm using the Windows Subsystem for Linux (WSL). Whether you’re loading large models like Stable Diffusion for local use or exploring creative AI applications, this setup offers unprecedented accessibility and power right at your fingertips. In this blog, we provide a step-by-step guide for configuring a WSL-based ROCm environment to run ComfyUI, including driver installation, dependency management, and PyTorch integration optimized for AMD GPUs (see figure 1).
What You Need to Get Started#
In order to take advantage of ROCm software on Windows using your AMD Radeon graphics card, there are a few pre-requisites required to get you started.
Step #1: Installing WSL and Ubuntu#
The following steps will show how to install ROCm on WSL with Ubuntu 24.04. Begin by opening Windows PowerShell or Command Prompt in administrator mode, and type the following:
wsl --install -d
Ubuntu-24.04
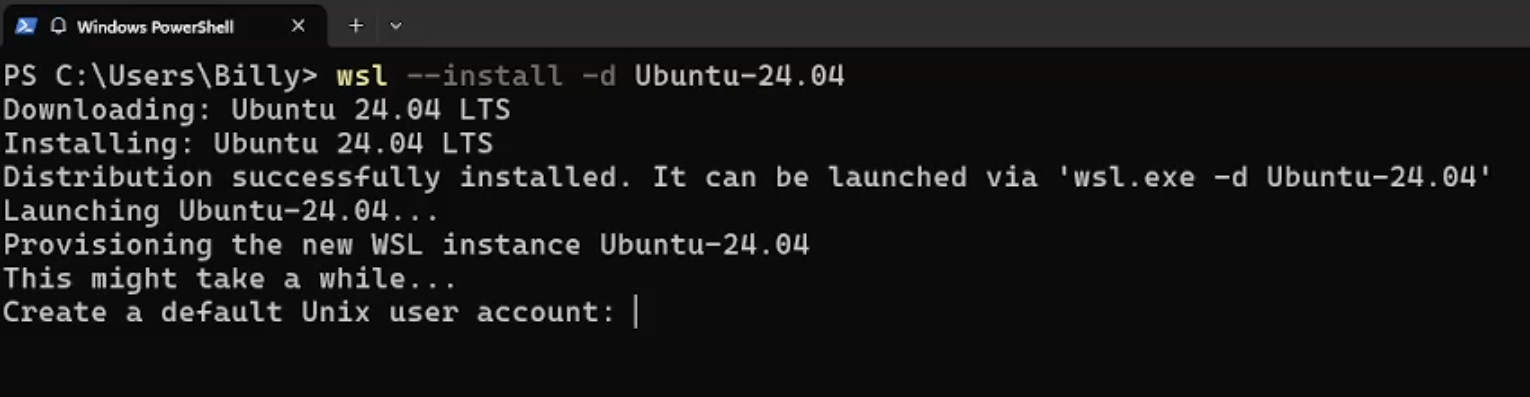
Figure 2: The image above demonstrates what you would see while installing WSL and Ubuntu#
Create your user account and password (see figure 2, above). This will be needed in a few of the steps further down.
Step #2: Install AMD Unified Driver Package Repositories and Installer Script#
Once you have Ubuntu installed, input the following commands one line at a time to install the installer script for Ubuntu 24.04 (see figure 3, below).
sudo apt update
wget https://repo.radeon.com/amdgpu-install/6.4.2.1/ubuntu/noble/amdgpu-install_6.4.60402-1_all.deb
sudo apt install ./amdgpu-install_6.4.60402-1_all.deb
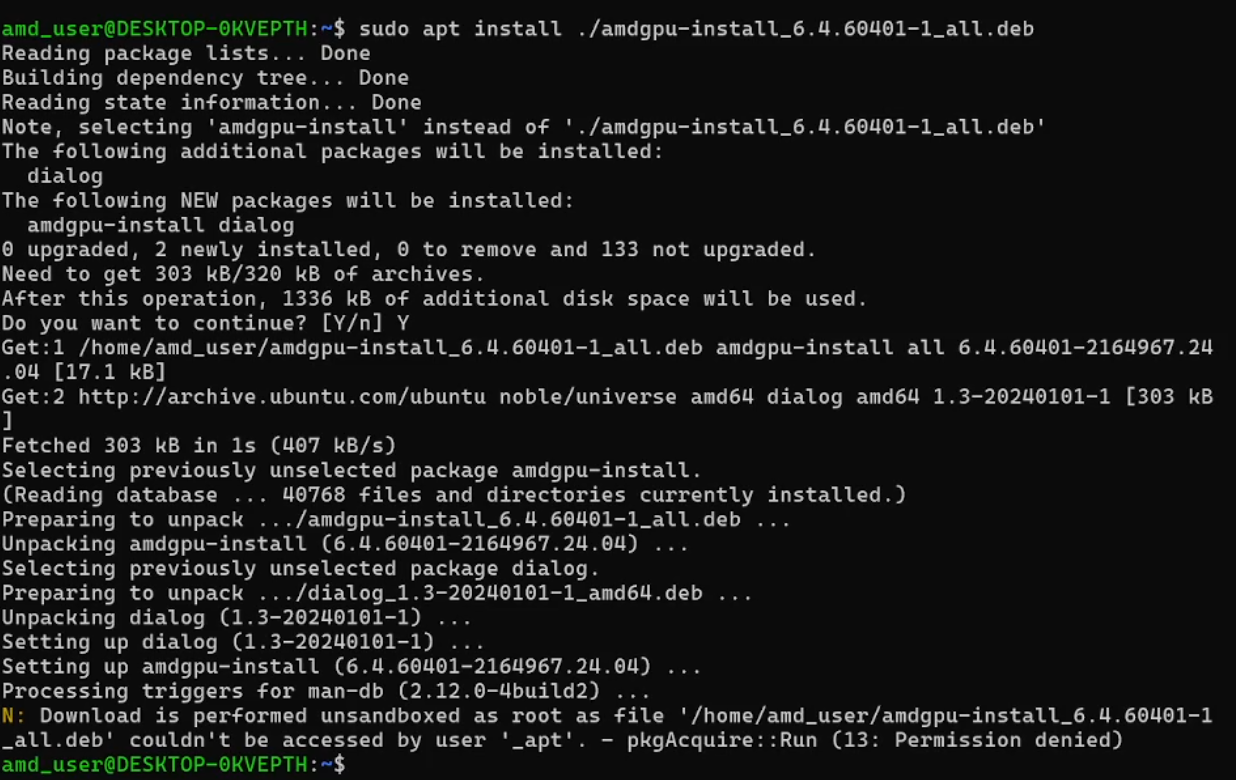
Figure 3: The image above demonstrates what you would see while installing the AMD Unified Driver Package Repositories and Installer Script#
Step #3: Install ROCm Unified Build#
Run the following command to install open-source graphics and ROCm software. Watch out for any output warnings or errors that may indicate an unsuccessful driver installation. This part may take a few minutes to complete.
amdgpu-install -y --usecase=wsl,rocm --no-dkms
Verify your installation and check if the GPU is listed as an agent with the following command:
rocminfo
See figure 4 below as an example of a GPU being listed as an agent.
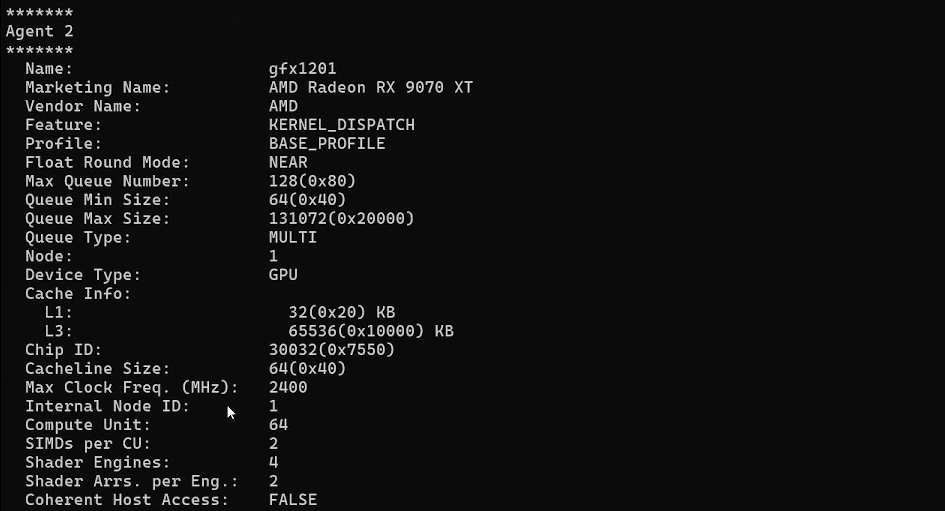
Figure 4: The image above shows an example of what you would see when verifying your installation#
Step #4: Install ComfyUI#
Now that ROCm is installed, the next step is to create a Python virtual environment which helps keep ComfyUI’s dependencies separate from the rest of the system and avoids conflicts with other Python projects that users may have. Type in the following command one line at a time:
sudo apt install python3.12-venv

python3 -m venv venv \--system-site-packages

source venv/bin/activate
AMD recommends the PIP install method to create a PyTorch environment when working with ROCm™ for machine learning development.
Enter the following command to unpack and begin set up.
sudo apt install python3-pip -y
Enter this command to update the pip wheel.
pip3 install --upgrade pip wheel
Enter all the following lines to install Torch and Torchvision for ROCm AMD GPU support (get latest links from: https://rocm.docs.amd.com/projects/radeon/en/latest/docs/install/wsl/install-pytorch.html)
wget https://repo.radeon.com/rocm/manylinux/rocm-rel-6.4.2/torch-2.6.0%2Brocm6.4.2.git76481f7c-cp312-cp312-linux_x86_64.whl

wget https://repo.radeon.com/rocm/manylinux/rocm-rel-6.4.2/torchvision-0.21.0%2Brocm6.4.2.git4040d51f-cp312-cp312-linux_x86_64.whl

wget https://repo.radeon.com/rocm/manylinux/rocm-rel-6.4.2/pytorch_triton_rocm-3.2.0%2Brocm6.4.2.git7e948ebf-cp312-cp312-linux_x86_64.whl

wget https://repo.radeon.com/rocm/manylinux/rocm-rel-6.4.2/torchaudio-2.6.0%2Brocm6.4.2.gitd8831425-cp312-cp312-linux_x86_64.whl

pip3 uninstall torch torchvision pytorch-triton-rocm

pip3 install \
torch-2.6.0+rocm6.4.2.git76481f7c-cp312-cp312-linux_x86_64.whl \
torchvision-0.21.0+rocm6.4.2.git4040d51f-cp312-cp312-linux_x86_64.whl \
torchaudio-2.6.0+rocm6.4.2.gitd8831425-cp312-cp312-linux_x86_64.whl \
pytorch_triton_rocm-3.2.0+rocm6.4.2.git7e948ebf-cp312-cp312-linux_x86_64.whl \
Update to compatible WSL runtime library.
location=$(pip show torch | grep Location | awk -F ": " '{print $2}')
cd ${location}/torch/lib/
rm libhsa-runtime64.so*
Once this is completed, verify your PyTorch installation.
Now that you have successfully installed PyTorch, you need to clone the ComfyUI repository with the following command:
git clone https://github.com/comfyanonymous/ComfyUI.git
To avoid conflicts with ROCm software PyTorch packages, comment out the following packages in requirements.txt: torch, torchaudio and torchvision (See figure 5, below).
Input the following, comment out the packages and save:
cd ComfyUI

sudo nano requirements.txt
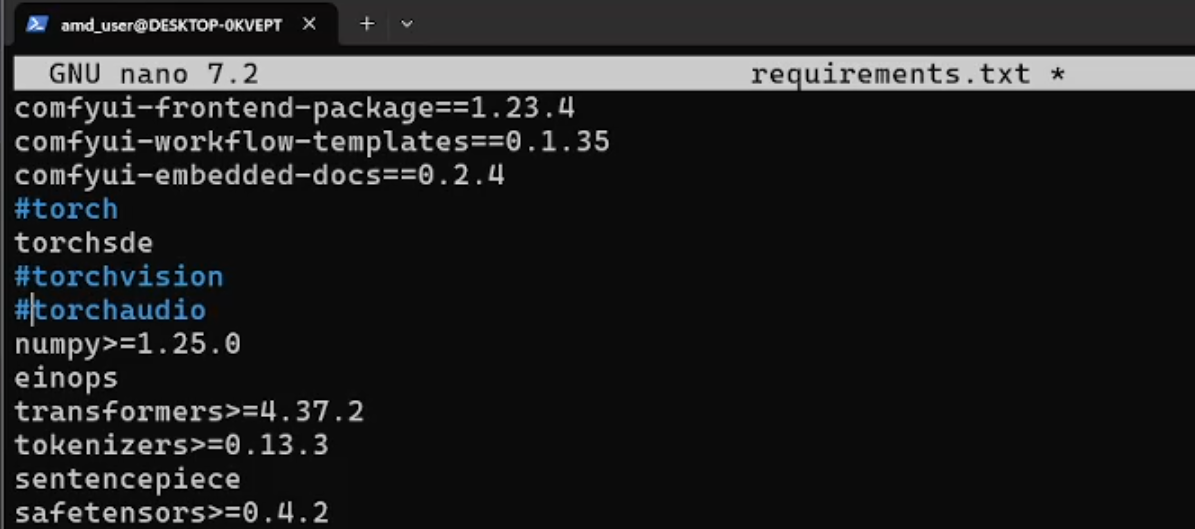
Figure 5: The image above shows torch, torchaudio and torchvision commented out. This step is important to avoid conflicts.#
Install ComfyUI requirements:
pip install -r requirements.txt
Load any model you’d like to use locally, such as Stable Diffusion 3, into the following directory:
cd ComfyUI/models/checkpoints
As an example, the sd3_medium_incl_clips.safetensors model can be added into this directory. Please note, you will need to sign into Hugging Face in order to download the SD3 model.
Step #5: Launch ComfyUI#
To launch ComfyUI, you need to return to the home directory of the repository in order to run main.py. Once you are there, type the following command:
python3 main.py
Once entered, you will receive a link that you can open in a web browser (See figure 6 and 7, below) and begin working with your local LLM. You are now ready to unleash your creativity!

Figure 6: The image above shows the ComfyUI link that you click on to open in a browser#
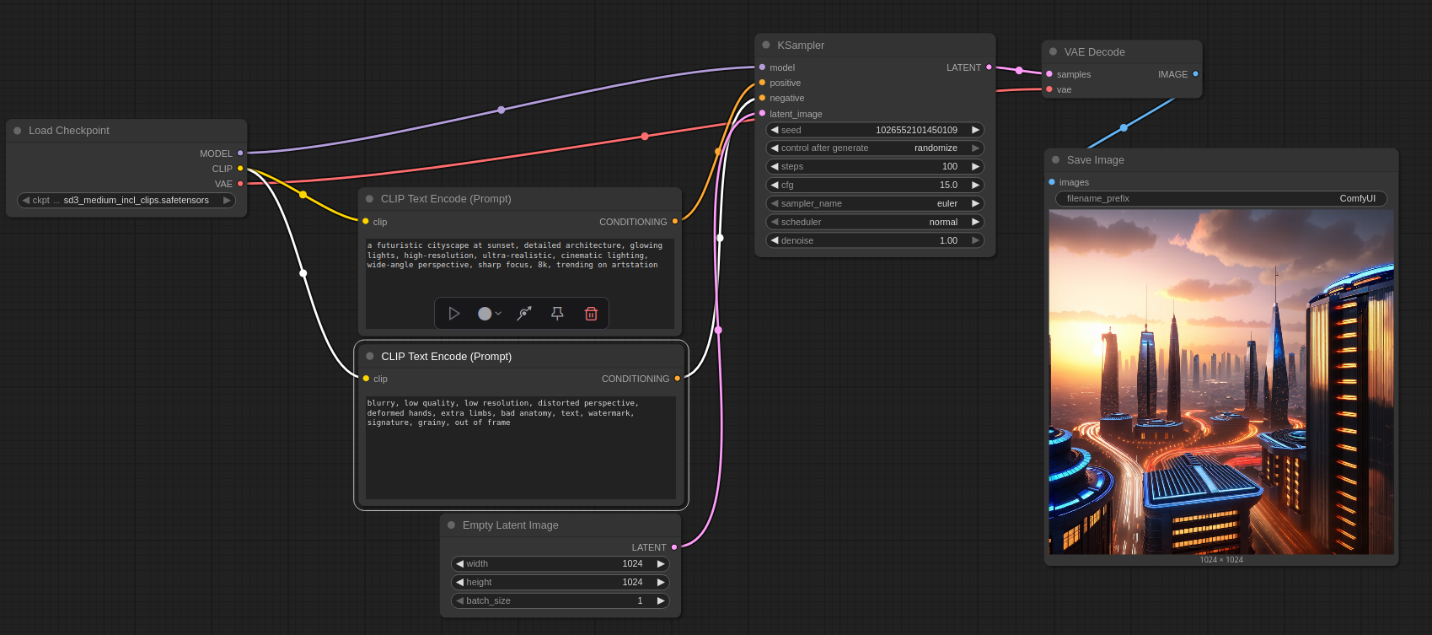
Figure 7: The image above demonstrates a usecase of what you could do with ComfyUI from your browser in Windows#
Launching ComfyUI After Initial Setup is Complete#
The next time you want to use ComfyUI, you simply need to follow these steps to get up and running again.
Open WSL
Type
source venv/bin/activate
Navigate to ComfyUI directory
cd ComfyUI
Type
python3 main.py
Copy address and open in browser
Summary#
By following the steps outlined, you can successfully run ComfyUI using ROCm on Windows through the Windows Subsystem for Linux, taking full advantage of AMD Radeon™ graphics. This setup transforms your Windows PC into a powerful computing hub, enabling seamless use of large models like Stable Diffusion and facilitating creative AI applications with unprecedented ease. Be sure to come back for more tutorial blogs like this one, or visit our AMD Developer Central and learn how you can unlock the full potential of your system.
Note
Blog was updated on: Aug 11, 2025
Added extra line to step #4 to include correct PIP installation version.
Useful Links#
Be sure to check out the following links for more information.
Install Radeon™ software for WSL with ROCm
Install PyTorch for Radeon GPUs on WSL
Install ComfyUI and MIGraphX Extension
Note
Blog was updated on: Aug 18, 2025
Updated formatting and sytax.
Disclaimers#
Third-party content is licensed to you directly by the third party that owns the content and is not licensed to you by AMD. ALL LINKED THIRD-PARTY CONTENT IS PROVIDED “AS IS” WITHOUT A WARRANTY OF ANY KIND. USE OF SUCH THIRD-PARTY CONTENT IS DONE AT YOUR SOLE DISCRETION AND UNDER NO CIRCUMSTANCES WILL AMD BE LIABLE TO YOU FOR ANY THIRD-PARTY CONTENT. YOU ASSUME ALL RISK AND ARE SOLELY RESPONSIBLE FOR ANY DAMAGES THAT MAY ARISE FROM YOUR USE OF THIRD-PARTY CONTENT.