Building a High-Performance Video Inference Pipeline with ROCm Libraries Using C/C++#
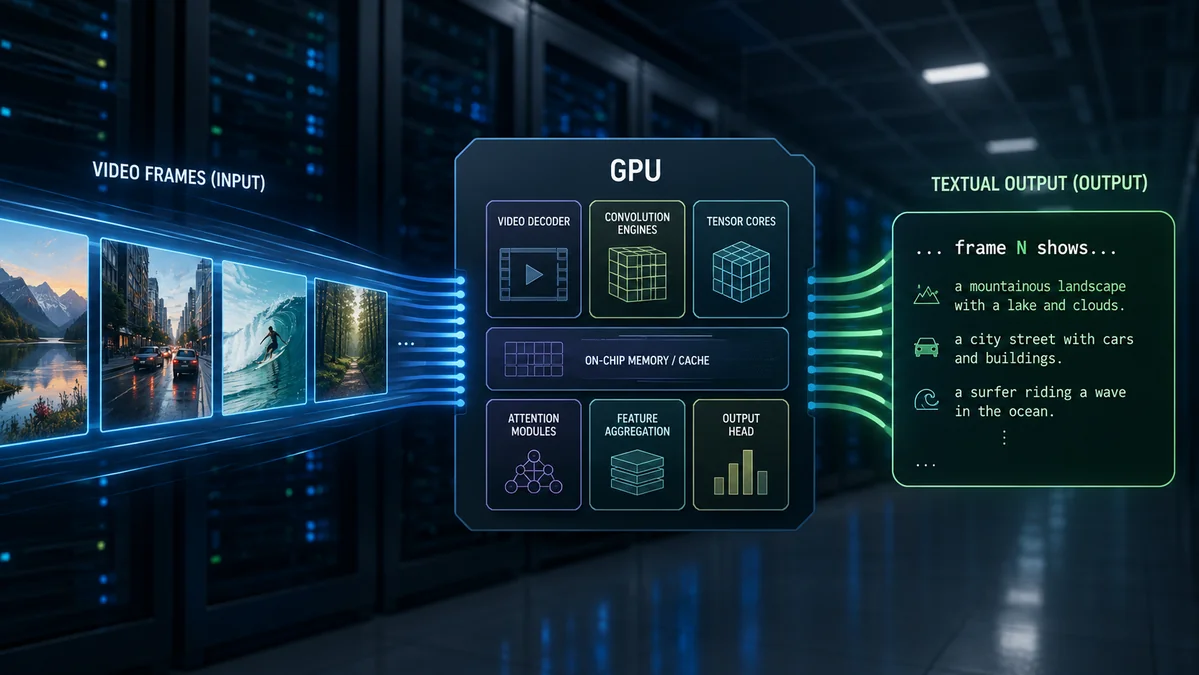
AMD ROCm™ software is an open-source software stack designed for programming AMD GPUs, spanning everything from low-level kernel development to high-level applications. It provides developers with direct access to the full capabilities of AMD hardware, enabling high-performance and power-efficient computing.
To fully benefit from ROCm, it is important to design applications that take advantage of GPU acceleration wherever possible. Offloading compute-intensive tasks to the GPU is often essential for achieving optimal performance and energy efficiency, especially given ROCm’s support for AMD RDNA™ and CDNA™ architectures, including RDNA 3.5 integrated graphics found in desktop and laptop systems.
In this tutorial, we will show how to build a pipeline which includes three different ROCm libraries:
rocDecode for hardware-accelerated video decoding
HIP for custom kernels
MIGraphX for efficient model inference.
We will walk through the process of ingesting a HEVC stream, decoding it, performing the necessary manipulations on the decoded frames, and running inference on each frame.
Environment#
Hardware Requirements#
As mentioned earlier, you will need an AMD GPU in your system to use ROCm libraries. While the latest RDNA 4 or CDNA 4 GPUs provide the best experience, RDNA 3.5 integrated graphics in a desktop or laptop system are also sufficient for following this tutorial. It is also important to develop and validate your application on the hardware available to you and scale it later to more powerful devices, such as a dedicated GPU or even datacenter Instinct accelerators.
You can consult the GPU hardware specifications to determine which hardware is available to you or identify a better alternative.
Software Requirements#
This tutorial focuses on Ubuntu 24.04. Historically, ROCm was developed primarily for Linux, so you will generally get the best experience by using Linux for both development and deployment. You may check the list of supported operating systems on the corresponding page.
Next, install the following components:
Install AMD GPU drivers
Follow the ROCm documentation rather than standalone driver instructions. Be cautious if Secure Boot is enabled, as it may complicate installation.Install ROCm (version 7.2.1 is used in this tutorial)
Newer versions should also work, but consistency helps avoid compatibility issues.Use Docker (recommended)
Docker simplifies setup and allows multiple ROCm versions to coexist on the same system. If you prefer a bare-metal setup, you’ll need to manually replicate the environment referenced in the Dockerfile.
Problem Statement#
In this tutorial, we will show how to build an efficient pipeline for decoding a HEVC stream, performing the necessary conversions on the GPU, and running inference using ResNet-18 on each frame.
We will review the following components of the implementation:
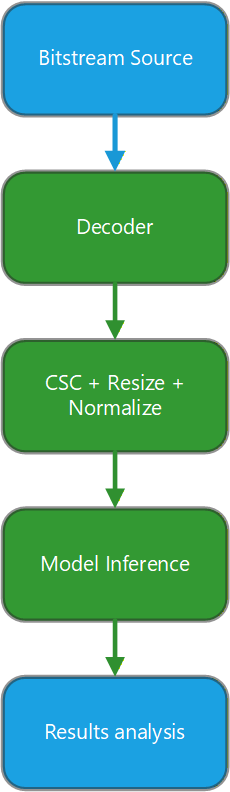
The decoder component will be implemented using the rocDecode library which enables hardware-accelerated video decoding on the GPU. Learn more about rocDecode (https://rocm.docs.amd.com/projects/rocDecode/en/latest/what-is-rocDecode.html). You can also find information about supported hardware and available codecs in the documentation. Information about consumer GPUs is available on the specification pages for each product. For example, see the page for the RX 9070 XT (section: Supported Rendering Format).
Color Space Conversion (CSC), resizing, and normalization will be implemented as a separate kernel in the application which uses HIP.
Learn more about HIP (https://rocm.docs.amd.com/projects/HIP/en/latest/what_is_hip.html). Understanding HIP also helps explain why ROCm-based applications require a customized LLVM toolchain. ROCm applications use specialized kernel declarations in the source code. These declarations are not supported by standard compilers.
Finally, the most important part is running inference on each frame. To do that, we will use a ROCm library named MIGraphX which provides efficient inference for ONNX models on AMD GPUs. Learn more about MIGraphX (https://rocm.docs.amd.com/projects/AMDMIGraphX/en/latest/index.html).
This tutorial demonstrates how applications can combine multiple ROCm libraries to build an effective pipeline which does most manipulations on the GPU without offloading data to system memory until the end.
Building and Running the Pipeline#
This tutorial uses the following Docker image as its build environment: rocm7.2.1_ubuntu24.04_py3.12_pytorch_release_2.7.1 which you can pull using the following command:
docker pull rocm/pytorch:rocm7.2.1_ubuntu24.04_py3.12_pytorch_release_2.7.1
Docker also allows multiple ROCm versions to coexist on the same system.
Next, you need to set up a specific build environment for building the example code. This tutorial is based on the usage of a custom LLVM version by AMD, which is available inside the Docker image mentioned above, but you will also need to compile the rocDecode and MIGraphX libraries used in the tutorial. It is important to build them on the target system to avoid compatibility issues that may arise when using packages from standard Linux repositories.
The Dockerfile used to build the image is included in the source files.
Let’s highlight a few non-obvious details.
The MIGraphX build configuration includes an important parameter
-DGPU_TARGETS=$GPU_TARGETS. You may adjust this argument according to the GPU architecture available
on your system (available in the GPU
specifications).
It also requires providing paths to LLVM compilers explicitly.
MIGraphX also requires a custom build system that can be installed using:
pip install https://github.com/RadeonOpenCompute/rbuild/archive/master.tar.gz
rocDecode also uses a Python-based script to set up the build environment:
python3 rocDecode-setup.py --developer=ON
One final workaround appears at the end of the Dockerfile: It rebuilds MIGraphX a second time. This is not strictly required, but it works around an issue when your application cannot run due to conflicts between multiple LLVM instances inside your application.
You can download Dockerfile and build it using the following command:
sudo docker image build . -t videopipe
This command creates a new Docker image tagged as videopipe[:latest].
Put the source files in a directory of your choice (for example, ~/tutorial).
You can then run the container using the following command:
sudo docker container run -it --device=/dev/kfd --device=/dev/dri --mount type=bind,src=.,dst=/workspace/videopipe --rm videopipe
It will run a Docker container in interactive mode (–it) and will remove it after exit (–rm). It also mounts the current directory as /workspace/videopipe inside the container.
Important arguments are “–device=/dev/kfd –device=/dev/dri”, which expose the GPU inside the container. Without these options, the GPU will not be available inside the container. More information about accessing a GPU in a container can be found in the “Running ROCm Docker containers” documentation. Especially, if you are planning to run it on Instinct GPUs.
The CMakeLists.txt is relatively simple and just configures the use of a custom compiler (allows HIP blocks to be compiled) and locates the required libraries (HIP, rocDecode, MIGraphX).
At this point, the videopipe directory should contain CMakeLists.txt and main.cpp. To build the application, run the following commands in the running container:
cd /workspace/videopipe
mkdir build
cd build
cmake ..
cmake --build .
After that, you should have a binary executable in /workspace/videopipe/build named “videopipe”.
To use it, you need to place a prepared video.h265 with resolution 1920x1080 in 420 format.
You must also provide a model.onnx file based on a ResNet-18 implementation. This can be done by converting a PyTorch model.
For example:
import torch
import torchvision.models as models
import onnx
import onnxruntime as ort
import numpy as np

# 1. Load the pre-trained ResNet-18 model and switch it to evaluation mode
model = models.resnet18(pretrained=True)
model.eval()

# 2. Create a dummy input tensor [1, 3, 224, 224]
dummy_input = torch.randn(1, 3, 224, 224)

# 3. Export to ONNX
torch.onnx.export(
  model,
  dummy_input,
  "model.onnx",
  export_params=True,
  opset_version=19,
  do_constant_folding=True,
  input_names=['input'],
  output_names=['output'],
  external_data=False
)

# 4. Verify with ONNX Runtime
ort_session = ort.InferenceSession("model.onnx")
ort_inputs = {ort_session.get_inputs()[0].name: dummy_input.numpy()}
ort_outs = ort_session.run(None, ort_inputs)
You can now place all required files (videopipe, video.h265, model.onnx[, model.onnx.data]) in one folder and just execute ./videopipe to process the video and display classification results for each frame.
After running the application you should see lines like:
Frame detected class: 975 confidence: 9.05893
Frame detected class: 975 confidence: 9.05893
Frame detected class: 975 confidence: 9.05893
Frame detected class: 975 confidence: 9.05893
The exact number of output lines depends on how quickly the scene changes in the source video stream. In the example above, the video contains a frame showing a shoreline, so the detected class is 975, which corresponds to “lakeside, lakeshore”. A mapping between class IDs and labels can be found in config.json of the original ResNet-18 model.
Summary#
This tutorial demonstrates how to build a fully GPU-accelerated video processing pipeline using ROCm. By combining rocDecode, HIP, and MIGraphX, you can efficiently decode video, preprocess frames, and run deep learning inference, all while keeping the data resident on the GPU.
This approach minimizes data movement, improves performance, and reduces power consumption. From here, you can extend the pipeline by:
Replacing classification models with object detection or segmentation models
Streaming video from a camera or network source
Scaling to more powerful AMD GPUs or datacenter accelerators
ROCm provides the flexibility and performance needed to build production-grade, GPU-first applications. The pipeline provides a strong foundation for further development.
Example Source#
Disclaimers#
Third-party content is licensed to you directly by the third party that owns the content and is not licensed to you by AMD. ALL LINKED THIRD-PARTY CONTENT IS PROVIDED “AS IS” WITHOUT A WARRANTY OF ANY KIND. USE OF SUCH THIRD-PARTY CONTENT IS DONE AT YOUR SOLE DISCRETION AND UNDER NO CIRCUMSTANCES WILL AMD BE LIABLE TO YOU FOR ANY THIRD-PARTY CONTENT. YOU ASSUME ALL RISK AND ARE SOLELY RESPONSIBLE FOR ANY DAMAGES THAT MAY ARISE FROM YOUR USE OF THIRD-PARTY CONTENT.